How to Print Avery Labels from Excel (2 Simple Methods)
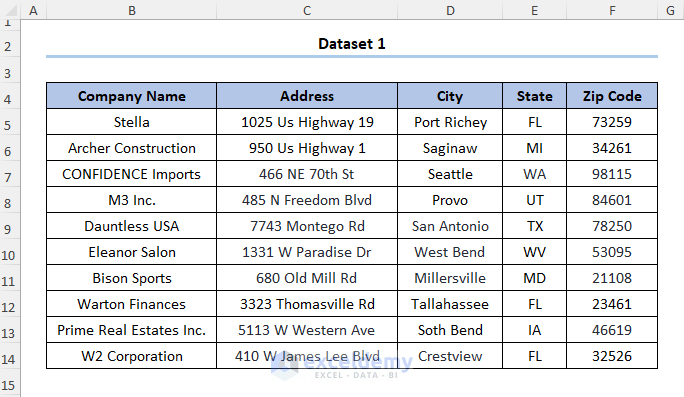
Let’s consider the following dataset shown in B4:F14 cells, with Company Name, Address, City, State, and Zip Code of each of the companies. Step 1 – Define Table of Recipients
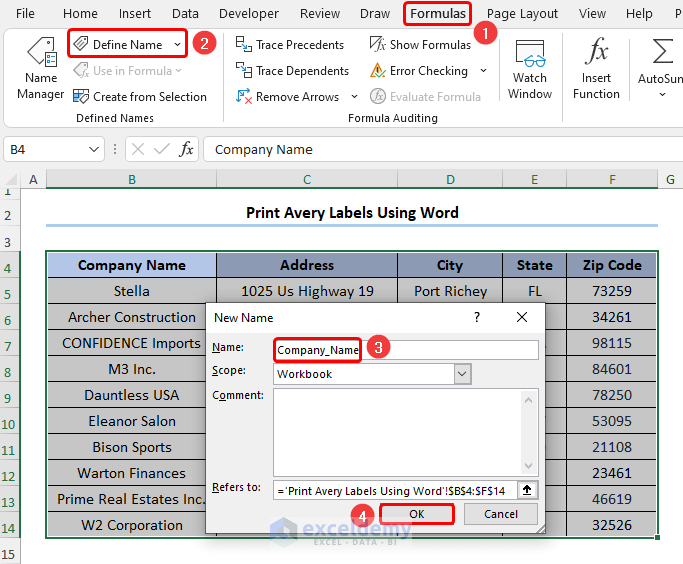
- Select the B4:F14 cells and go to Formulas and select Define Name.
- A dialog box appears where you need to provide a name. We used Company_Name.
Note: Make sure there are no blank spaces between the words. Rather, you may use an underscore to separate each word.
Step 2 – Make Avery Labels in Word
- Open a blank document in Microsoft Word. and go to the tab.
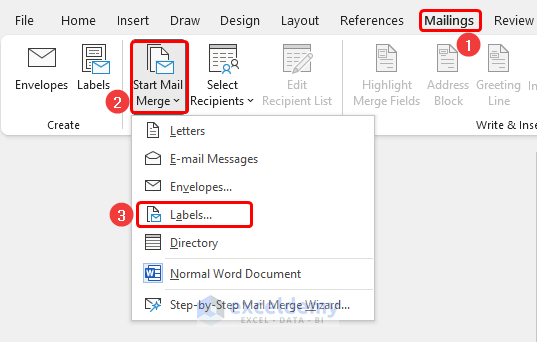
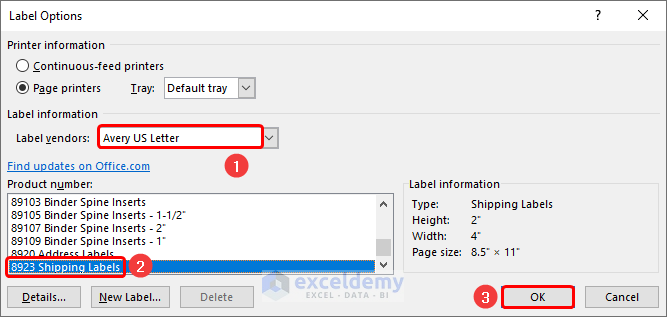
- Navigate to Mailings >Start Mail Merge > Labels.
- Select Design > Page Borders.
- A Wizard box appears. Choose Borders tab and select Grid.
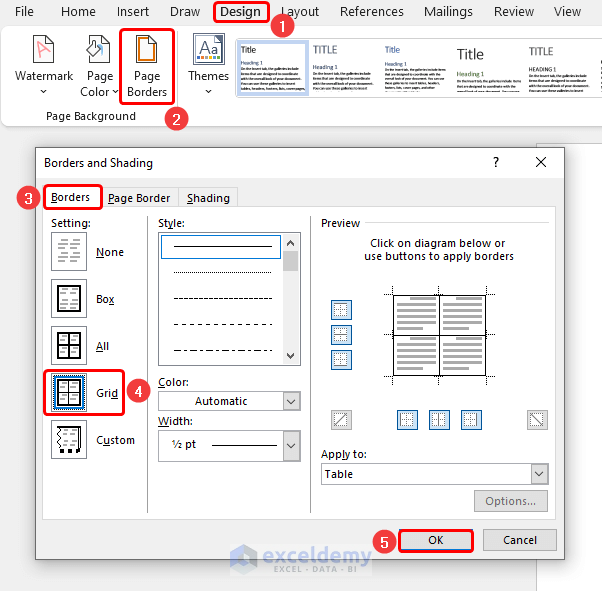
This generates the grid in the blank document.

Step 3 – Import Recipient List From Excel into Word
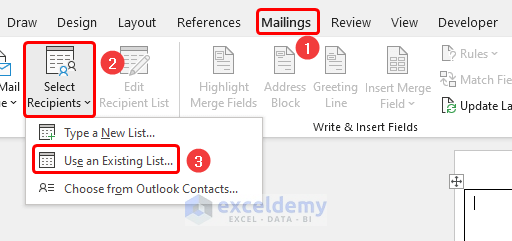
- Navigate to Mailings.
- Choose Select Recipients and select Use an Existing List.
- Import the source data into Word by selecting the Excel file, in this case, Print Avery Labels.
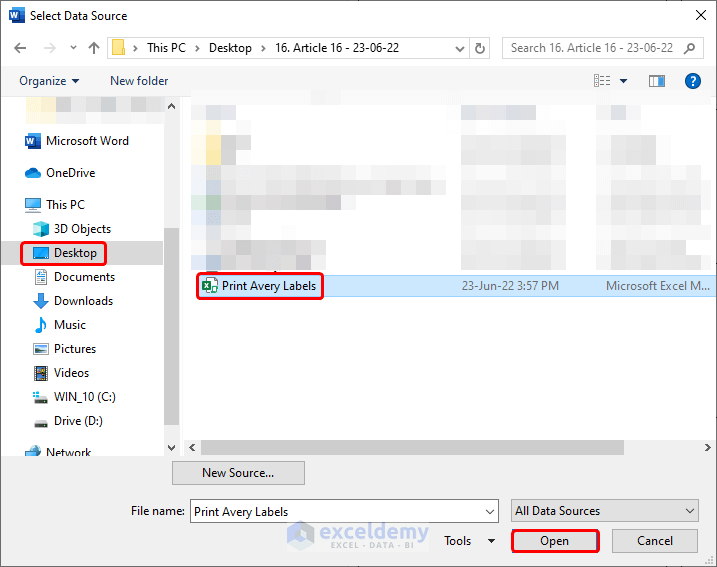
- We choose the table name Company_Name from the list.

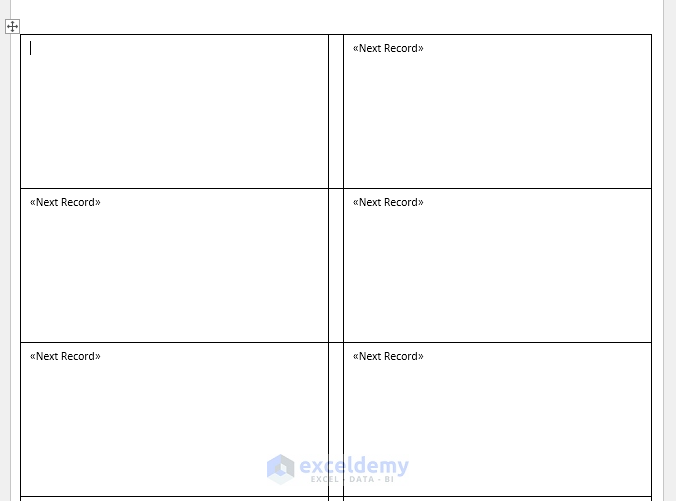
This establishes a connection between the Excel worksheet and the Word document.
Step 4 – Insert Fields in Word
- Go to Mailings and select Address Block.
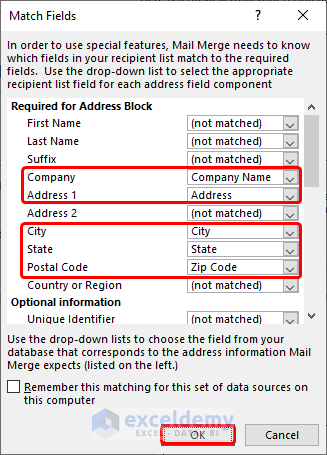
- Choose the Match Fields options from the dialog box.
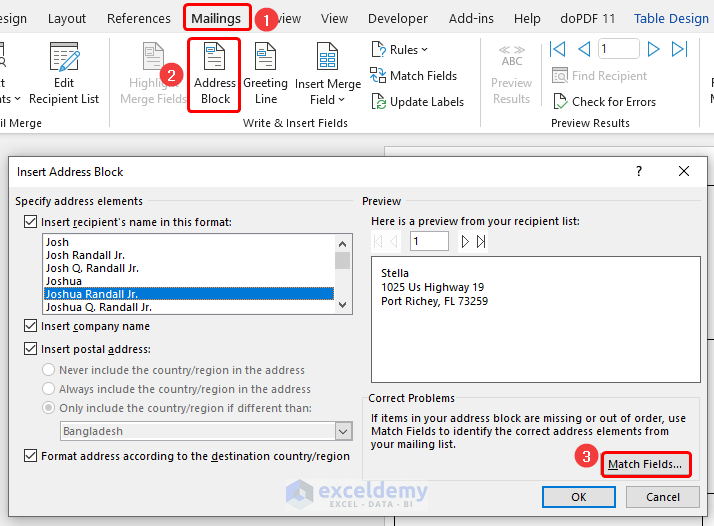
- The column headers from the worksheet automatically match their respective fields.
- Click OK to close the dialog box.
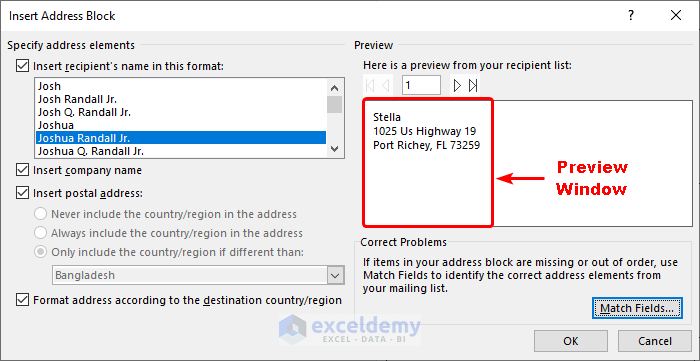
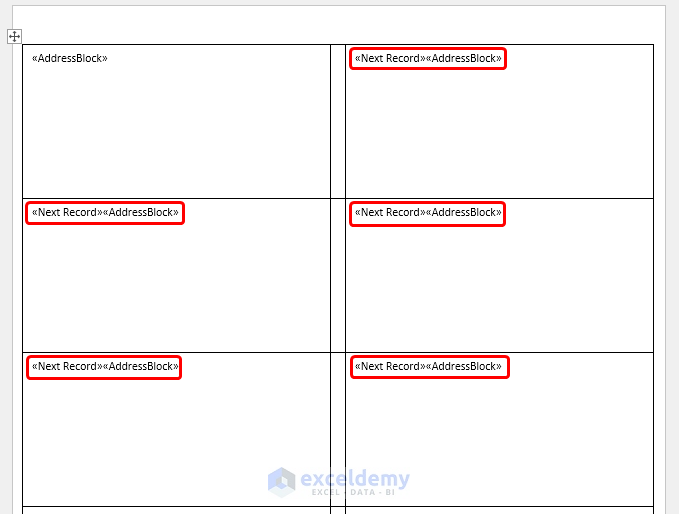
We see a preview of the labels to correct any flaws before proceeding further.
- Click on Update Labels located in the Mailings tab.
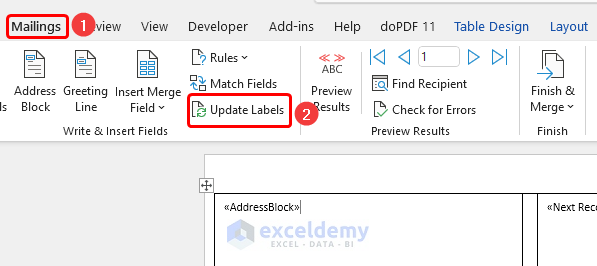
- All the labels change to AddressBlock.
Step 5 – Complete the Merging Process
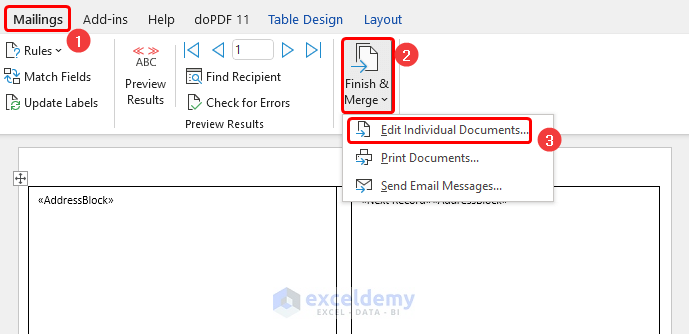
- Go to Mailings, select Finish & Merge, and choose Edit Individual Documents.
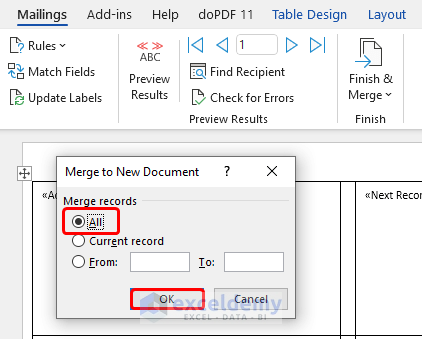
- In the dialog box, check the option “All” and click OK.
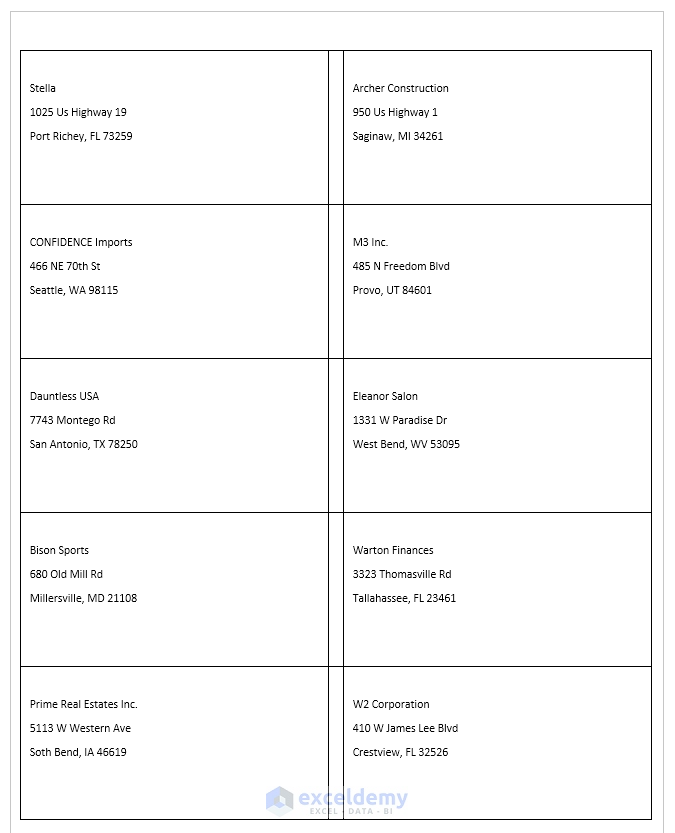
Eventually, all the labels appear in the Word document.

- Press CTRL + P to open the print option in Word.
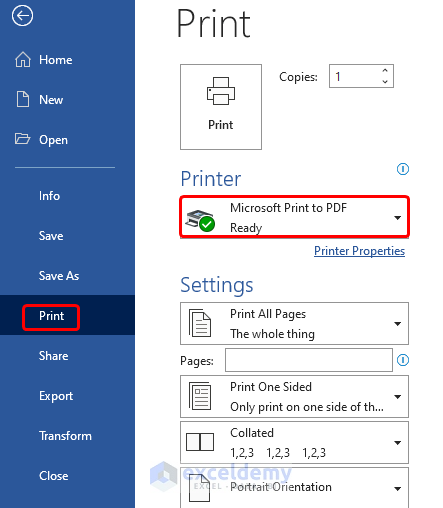
- You can see a preview of the labels from the preview window.
Method 2 – Print Single Avery Label Without Word from Excel
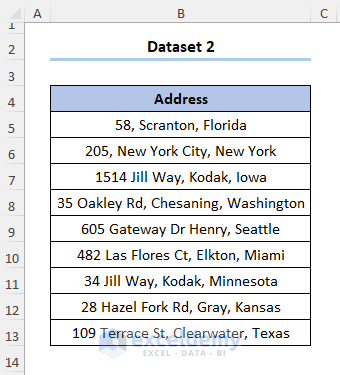
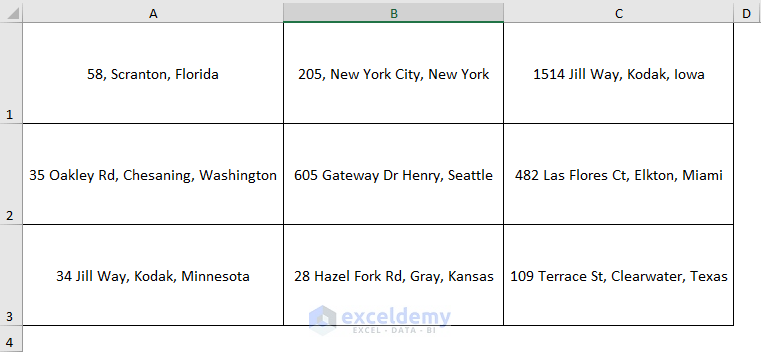
Suppose we have the following dataset in the B4:B13 cells with only one column showing the Address.
Step 1 – Make a Copy of the Dataset
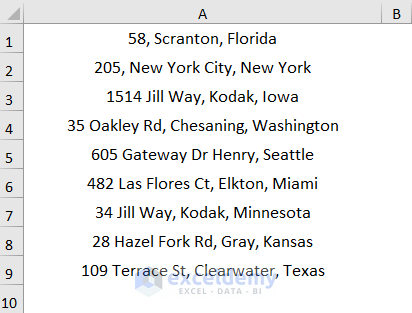
- Copy the dataset and paste it into a new worksheet.
Note: You need to paste the data in the first column starting from the A1 cell and remove any column headers.
Step 2 – Insert the VBA Code
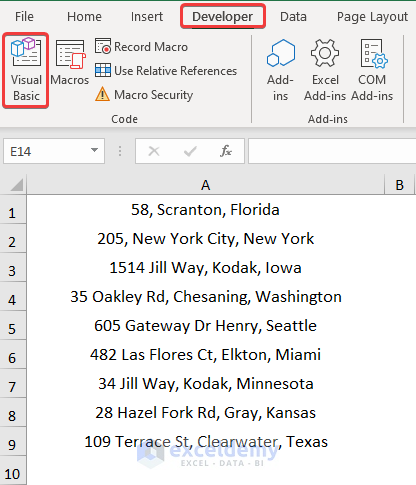

- Insert a Module where you’ll paste the VBA code.
- Copy and paste the code from here.
Sub Makelabels() Application.Run "EnterColumn" Cells.Select Selection.RowHeight = 75.75 Selection.ColumnWidth = 34.14 With Selection .HorizontalAlignment = xlCenter .VerticalAlignment = xlBottom .WrapText = False .Orientation = 0 .AddIndent = False .IndentLevel = 0 .ShrinkToFit = False .ReadingOrder = xlContext .MergeCells = False End With With Selection .HorizontalAlignment = xlCenter .VerticalAlignment = xlCenter .WrapText = False .Orientation = 0 .AddIndent = False .IndentLevel = 0 .ShrinkToFit = False .ReadingOrder = xlContext .MergeCells = False End With End Sub Sub EnterColumn() Dim reference As Range Dim item As Long Dim data As Long Set reference = Cells(Rows.Count, 1).End(xlUp) data = 1 On Error Resume Next incolno = InputBox("Enter Number of Columns Desired") For item = 1 To reference.Row Step incolno Cells(data, "A").Resize(1, incolno).Value = _ Application.Transpose(Cells(item, "A").Resize(incolno, 1)) data = data + 1 Next Range(Cells(data, "A"), Cells(reference.Row, "A")).ClearContents End Sub
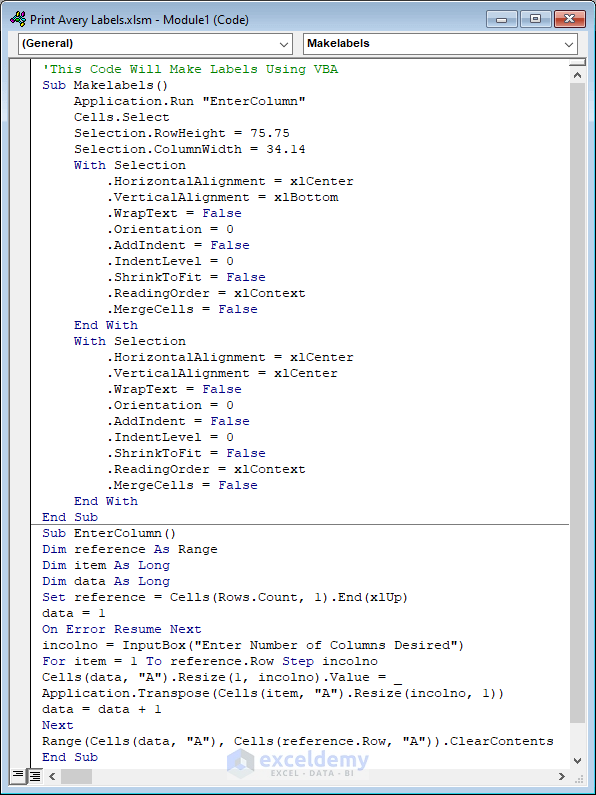
Code Breakdown:
The code is divided into two sections.
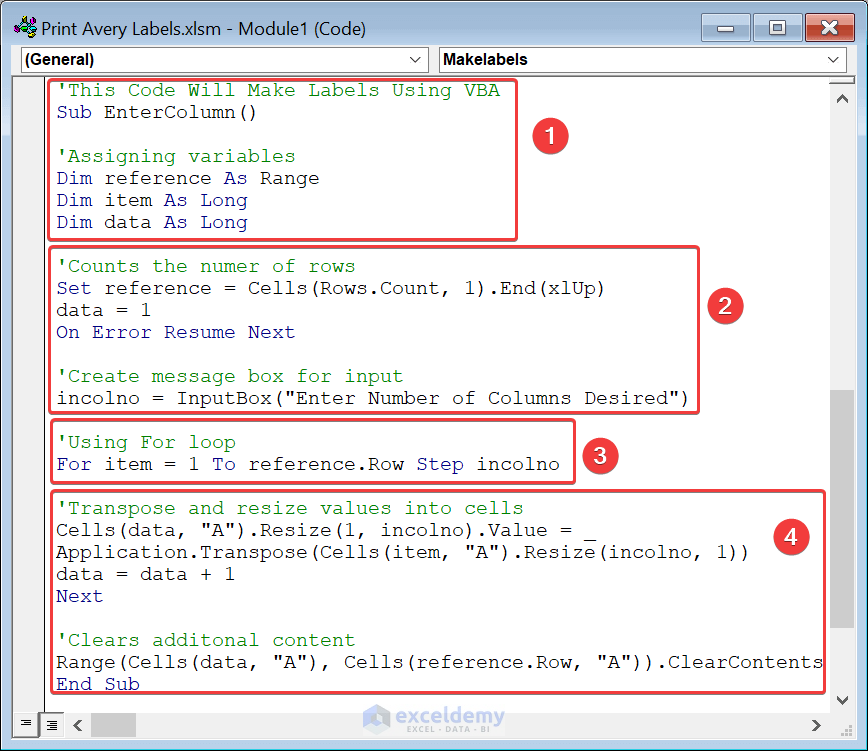
Section 1 – Explanation of EnterColumn() sub-routine
The explanation of the VBA code is provided below.
- The sub-routine is given a name, and the variables are defined.
- We count the number of rows and create an InputBoxto take inputs from the user.
- A For loop runs as many times as specified in the InputBox.
- We Transpose the column into rows, resize the cells, and remove any extra contents.
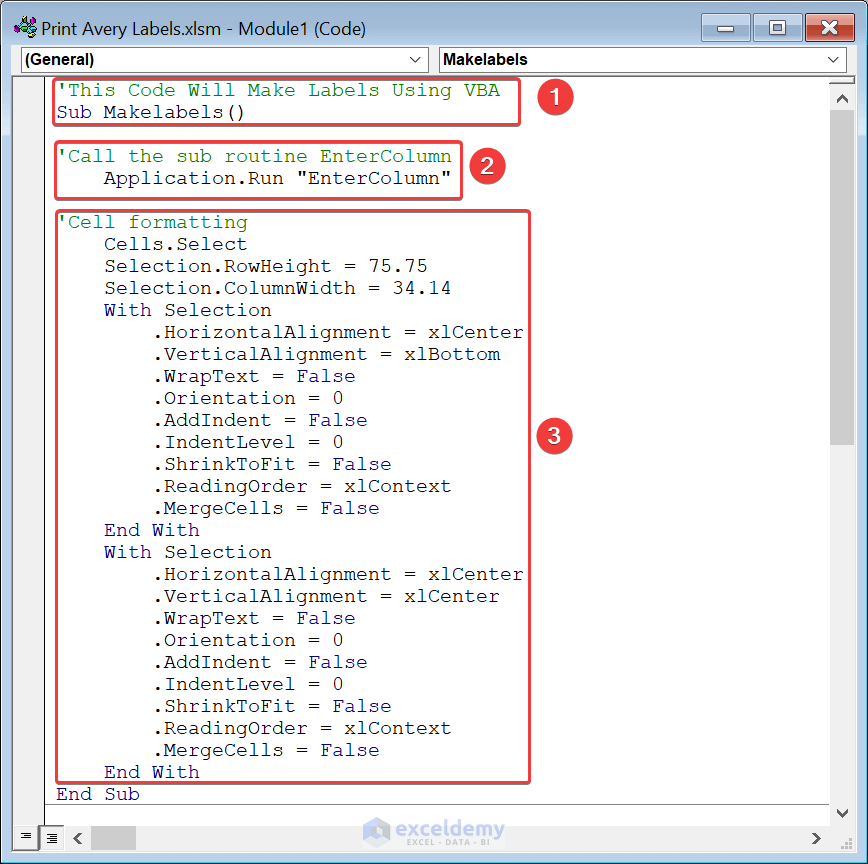
Section 2 – Description of Makelabels() sub-routine
- The sub-routine is given a name.
- We execute the sub-routine.
- We specify the cell formatting using the Cells property.
Step 3 – Running the VBA Code to Generate Labels
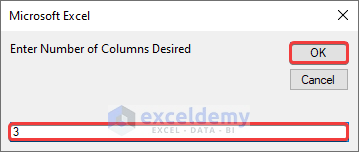
- Press the F5 key to run the Makelabels() sub-routine.
- In the dialog box, enter the number of columns.
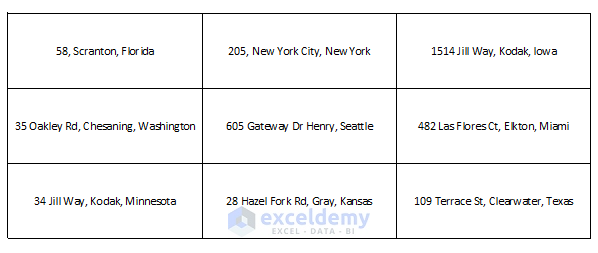
- You can add borders using the All Borders option in the Home tab.
Step 4 – Print Labels from Excel
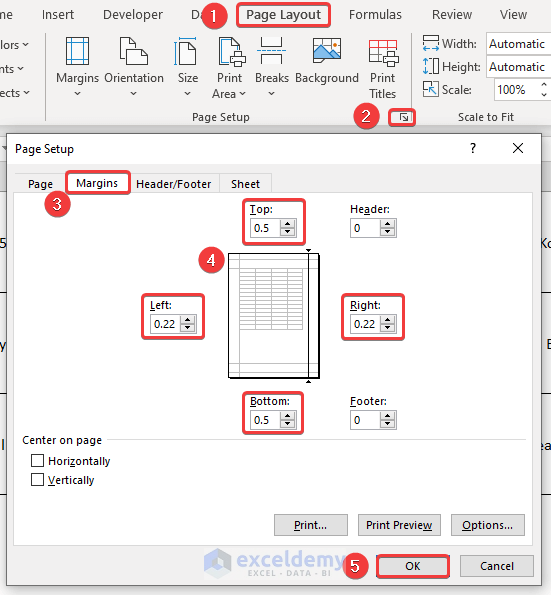
- Go to the Page Layout tab and click the Page Setup arrow at the corner.
- Select the Margins tab and adjust the page margin as shown below.
- Use CTRL + P to open the Print menu.
- Press the No Scaling drop-down and select Fit All Columns on One Page option.
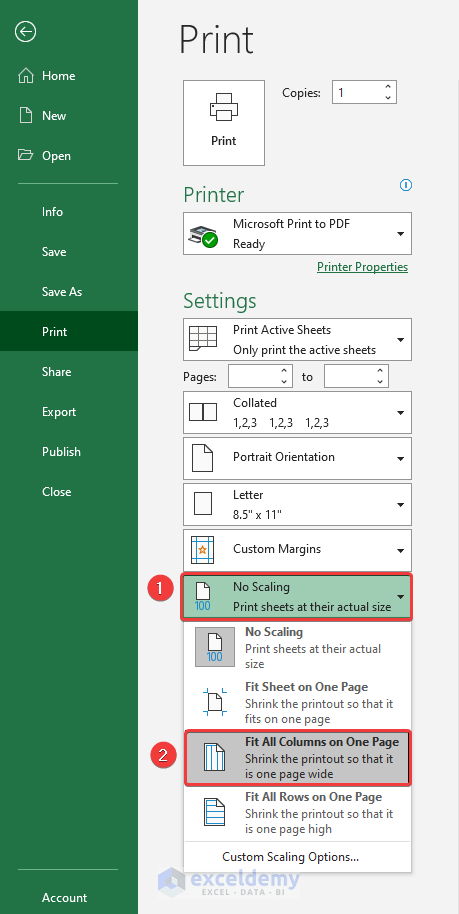
- You’re ready to print the labels.
Things to Remember
- Method 2 only applies if you have a single column in your dataset.
- Format column headers so that they stand out from the rest of the data.
- Ensure there are no empty cells as this may lead to unexpected results.
Download Practice Workbook
